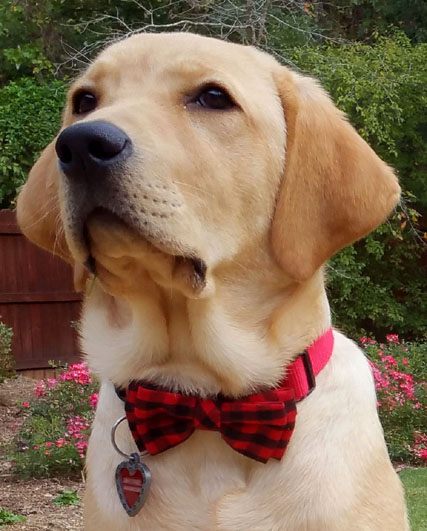
After I had purchased two small doggie bow ties at a pet store to use in
puppy Don's five-month photo shoot I started calling him "Dapper Don"
when he was wearing one of them. He's not a gangster or a rapper but just an
awesomely cute puppy when he's wearing a bow tie! Is this not the essence
of doggie dapper-ness??
I got the idea of dressing him up from the trendy college-age co-raisers of one of his littermates
named Paulson, who's in another Southeastern Guide Dog puppy raiser group in Georgia.
Paulson is a handsome black Lab pup who also looks quite dapper in a
bow tie. His co-raisers frequently post photos of him on Facebook and
Instagram. This is the first photo I saw of Paulson, when he was only
three months old. I cropped it so the bow is more prominent.
Isn't he adorable??

By now Don is getting a little big for the small bows I bought two
months ago. I was unable to find larger ones I liked at a price I
also liked so I decided to start making my own.
Jim and I like the numerous "tutorials" on YouTube so I searched
there first for instructions. Bows for either male or female dogs are
surprisingly easy to make, either with or without a sewing machine, and
they don't take much fabric.
You can use quilting or other scraps of fabric you already have, or
buy inexpensive "fat quarters" at craft and fabric shops. I have lots of
fabric pieces already from quilting and other sewing projects throughout
my lifetime. I've used some of those to make bows. I purchased the black-with-white
paw print fabric from Walmart for the bow I show in the directions in this entry.
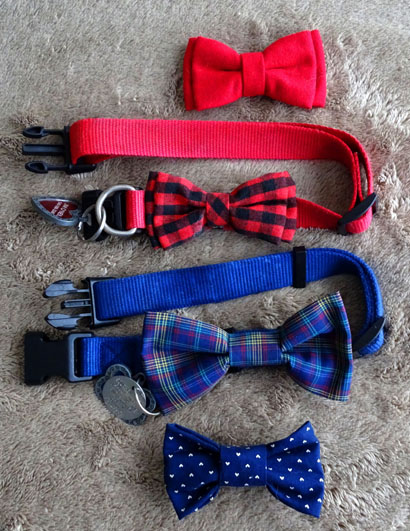
The two red bows in the next picture are the ones I purchased at a
pet store. They are 4" wide and cost about $5 for the set.
I made the two blue bows from scraps I already had. The larger plaid
one (5.5" wide) is better proportioned for Don's increasing size so I'll
make a larger version of the little 4" blue one with hearts at the
bottom of the picture. I have plenty of that fabric left.
Allow extra fabric, time, and patience if
you are trying to match plaids or focusing on a particular part of a
design to show on the finished product. It took me a lot longer to get
the multi-colored plaid bow just right than it did the paw print or heart
designs.
I've included directions and comments with each step below.
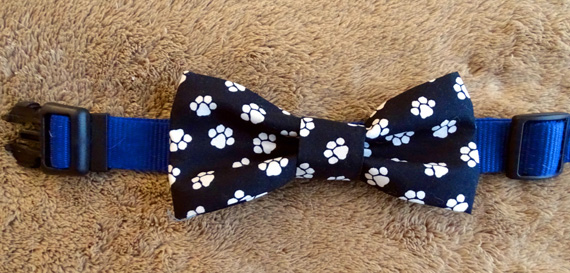
This is the finished 5.5" wide paw print bow:
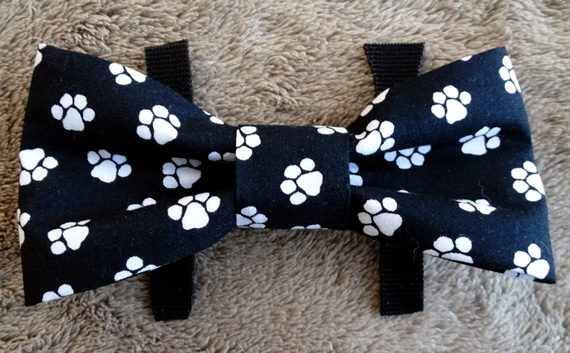
The bow looks navy in that photo but it's a black background.
The YouTube link at the end of this entry is the video I followed
most closely, but not exactly. There are other methods that don't require
any sewing, or you could hand-stitch the method here if you don't have a
sewing machine.
LET'S GET STARTED!
These are the supplies I used: woven cotton fabrics, matching thread, some
lightweight interfacing, and reversible Velcro ties to attach the bow to the dog
collars.
You'll also need some sort of paper to make your patterns, a ruler or
measuring tape, pen or pencil, sewing scissors and/or pinking shears, and an iron.
Interfacing isn't necessary if you want a bow that is softer.
The smaller the bow, probably the less any interfacing is needed. I've
made bows both with and without the interfacing.
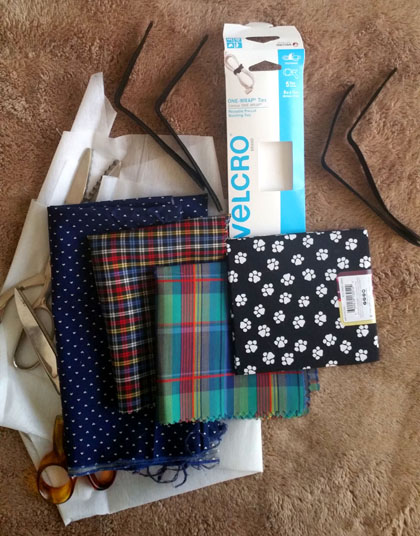
I got the reversible Velcro ties in the fastener department at Home Depot.
The packages are cheaper there or at Walmart than in a fabric store. I've
also used wider reversible Velcro ties than those shown and cut them about
a half inch wide.
I made several sizes of paper patterns as I was
experimenting with different sizes of bows.
In the YouTube video, Lindsey suggests a 5x8" piece of fabric for a
medium-sized male bow. That's what I used for the smaller blue bow I
made first and it is already too small for Don. It came out less than 4" wide.
I experimented with 6.5" by 14" for the blue plaid bow I made next and
it was too wide. I tore it apart and made it 6.5" x 12" wide instead. That
makes about a 5.5" wide bow, which is a good proportion for a 55-75 lb. dog.
Lindsey says to enlarge in the other direction for a more feminine
female bow. When I make one for Holly or Casey I'll probably cut the
fabric 8x12".
The 3x5" piece in the picture below is good for the center of just about
any size bow you're making. You can easily adjust the width and some of
the length will be cut off at the end of the process.
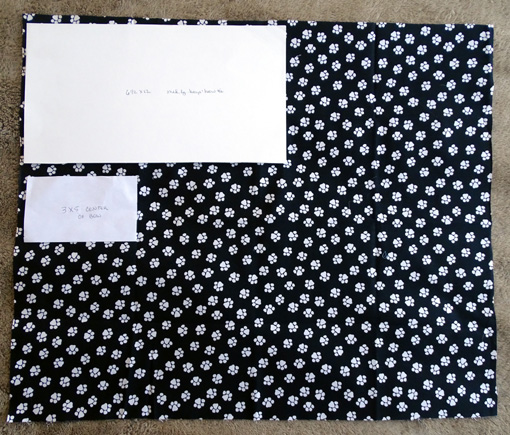
I used the selvedge for one edge and pinked the rest of the fabric to reduce fraying.
I cut a piece of lightweight interfacing for the three bows in this entry;
the center piece doesn't need interfacing.
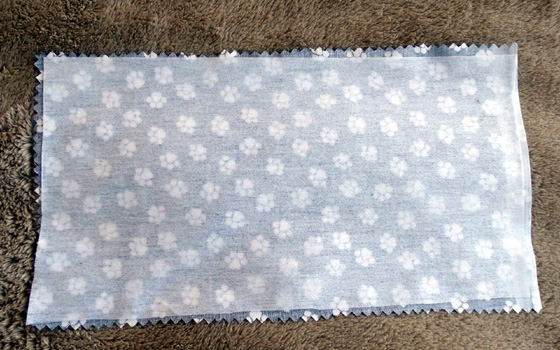
After cutting out the pieces, place the interfacing on the wrong side
of the fabric. Be sure all the wrinkles are out of both pieces:
Fold the fabric and interfacing lengthwise, right side inside, and stitch 1/4 -1/2"
from the edge. You could hand-stitch closely if you don't have a sewing machine:

Turn the large bow piece right side out and press with the seam in the center. Look closely
at the paws in the photo below to locate the seam:
Press the 3x5" piece of fabric into thirds. I show it wrong side up in the photo above.
The width can be adjusted depending on how wide you want the center piece to be when you
wrap it around the bow.
I turned both pieces right side up for the next photo.
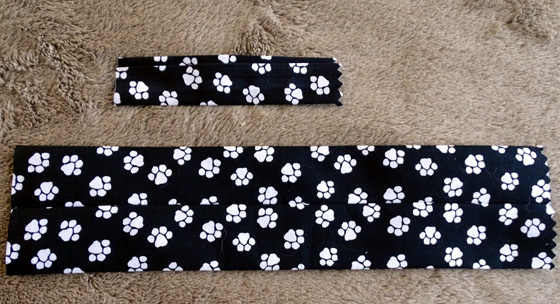
Cut two 3" strips of the reversible Velcro for collars that are 1/2 inch to an inch wide.
Cut them at least 4" long if they will go on a 1.5" collar.
Place the strips of Velcro on the right side of the bow about 1 to 1.5" from
the ends. Stitch as shown below. Either side of the Velcro can be up but my sewing
machine slid over it better with the soft side up. Stitch over it about three times as
shown:
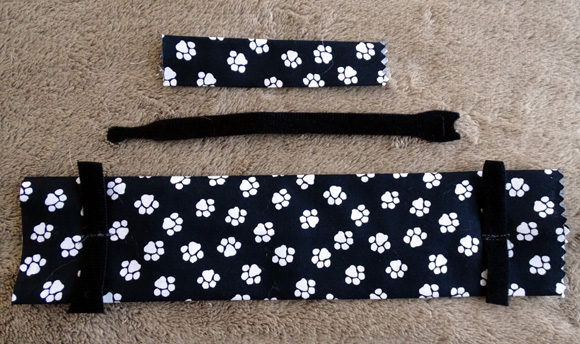
An 8" long Velcro tie strip is in the middle in the photo above just to
show what it looked like before I cut off the ends to make the strip more uniform
in width. Then I cut it in half for the two pieces used on the bow.
Now fold the large piece of fabric over on itself as shown in the next photo and stitch
down the middle through all the layers. Center the seam the best you can:
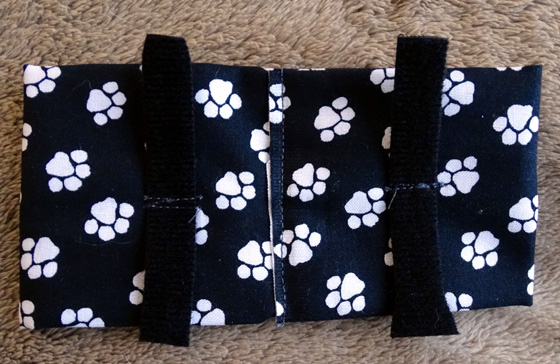
Turn the bow over and this is what the right side now looks like. You're almost done!
Scrunch it in the middle with your fingers to make it look like a bow tie, then wrap the
center piece around it, right side up. Cinch it loosely enough so the center will
cover the collar when the bow is attached.
I originally cinched the center of the blue plaid bow too tight and the dog collar showed
too much. I took the center piece off, cut and pressed another one, and attached that one
more loosely. Don't be afraid to experiment until you get the look you want!
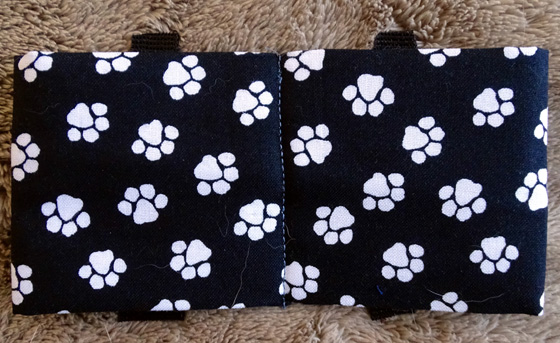
The last step in Lindsey's "fast" method is to stitch the center
piece on the back, as shown below, and trim off any extra fabric:
I used pinking shears to cut off the excess so the fabric doesn't ravel.
In her video Lindsey also shows a different method if you want the seam
of the center piece on the inside to
look more finished and professional. That would be preferable if you're making bows to sell
or for gifts. The faster method doesn't show the raw edge on wrong side of the bow when it is on
Don's collar so I've been making all of his bows that way.
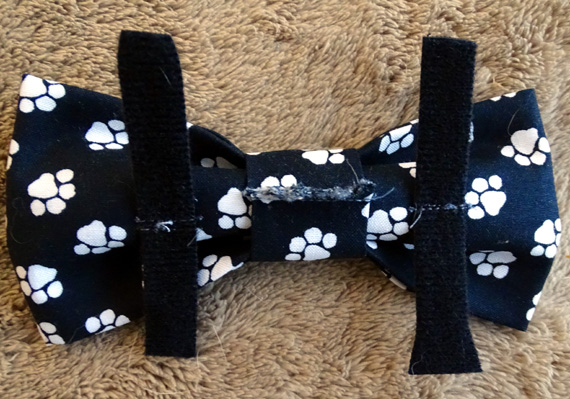
Voila! Here's the finished bow attached to Don's 1" wide collar:
This is the back side:
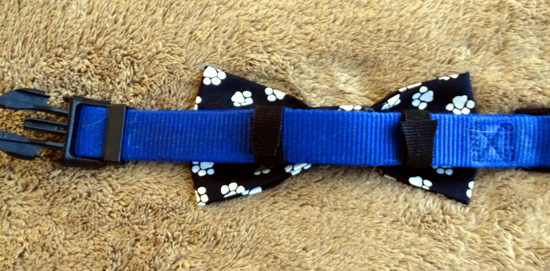
The Velcro tabs make the bow soooo easy to get on and off. I strongly advise not using elastic
or any other fastener. If the Velcro is too long when it's attached to the collar, trim off
the excess. It's better to start with too much than too little.
And that's all there is to it! It's been fun to make bows for Don. I'm sure I'll
continue making more in the future, including some more feminine (wider) ones for Holly and Casey.
My favorite color for Dons accessories is bright or dark blue. His guide coat is blue and
he usually wears a blue collar. Blue is also a nice contrast to his dark yellow, almost cinnamon, fur
color. That makes sense, since blue and orange are "complimentary colors"
on opposing sides of the color wheel.
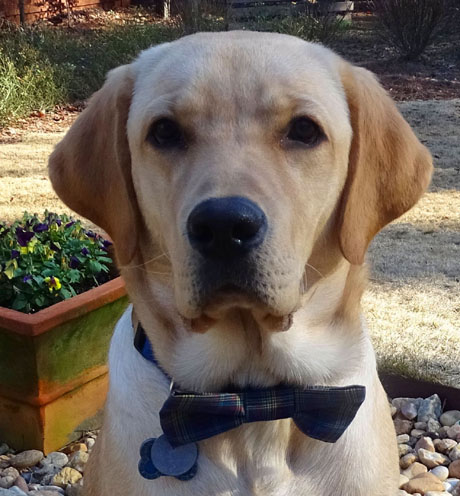
Dapper Don in his new plaid bow
Here's the link
for Lindsey's YouTube video. If that video is gone when you hunt for it, there are
plenty more with instructions for making bow ties. Have fun!
Next entry: hiking and orienteering at Sweetwater Creek State Park in Georgia
Happy trails,
Sue
"Runtrails & Company" - Sue Norwood, Jim O'Neil,
Casey-Girl, and Holly-Pup
Previous
Next
© 2019 Sue Norwood and Jim O'Neil