I'm sure I did! I spent a lot of time playing -- and working
-- in the dirt in the spring.
Want to know a good way to meet neighbors you either haven't met yet
or haven't seen in a while? Just get out and start digging in your front yard!
People aren't outwardly nosy in this neighborhood but I'm sure
many of them were curious at the beginning of our project, and several
stopped later on to compliment the results when they saw all the pretty
flowers being planted.
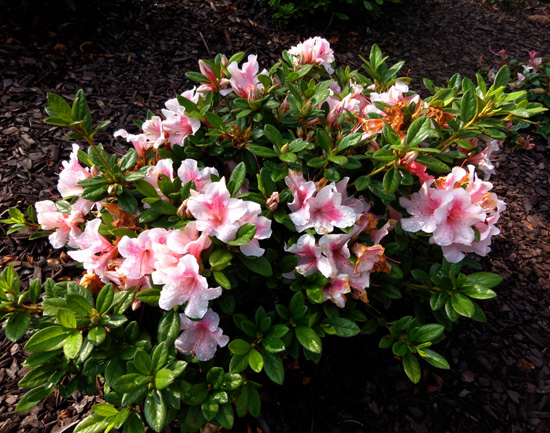
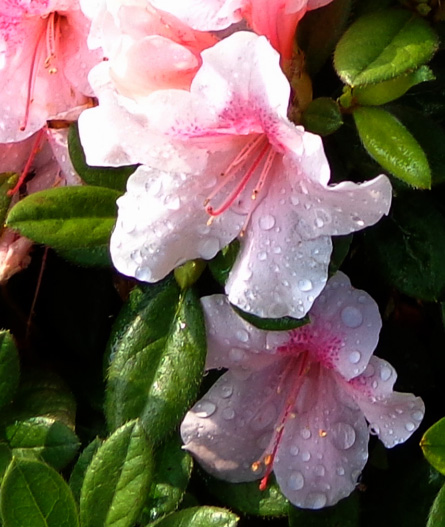
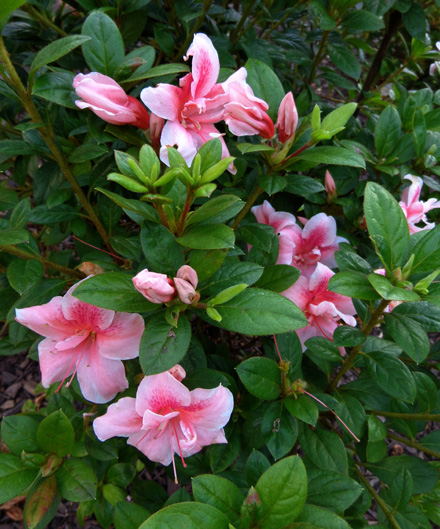
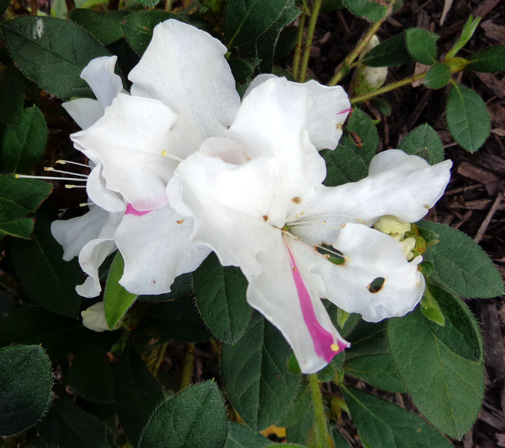
Above and below: Encore Autumn Chiffon
re-blooming azalea,
one of about two dozen azaleas we planted in the
front yard (7-2-18)
Not even halfway through this project, I was afraid that maybe I'd
bitten off more than I could chew.
Fortunately, it turned out pretty well, if my own opinion and
favorable comments from Jim and our neighbors are any indication.
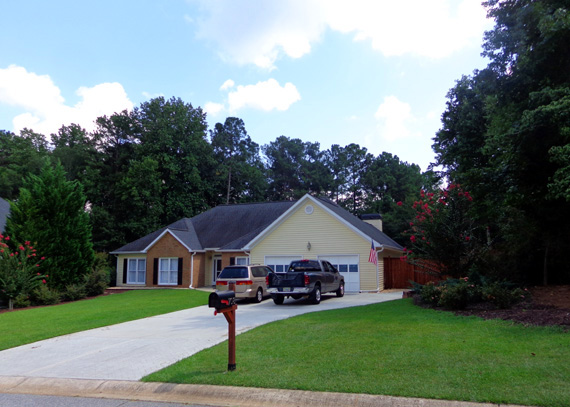
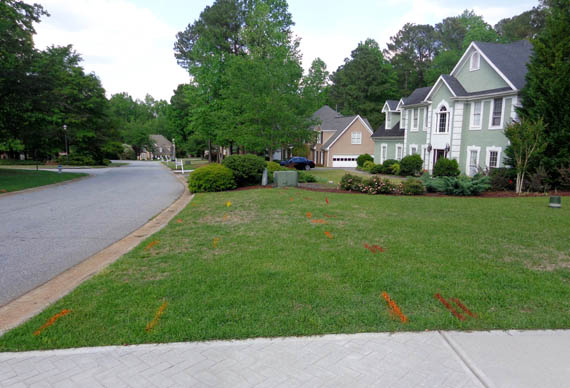
Here's a picture of the front yard before we started digging it up
right after the utility locator companies marked the electric, gas,
water, and AT&T lines:
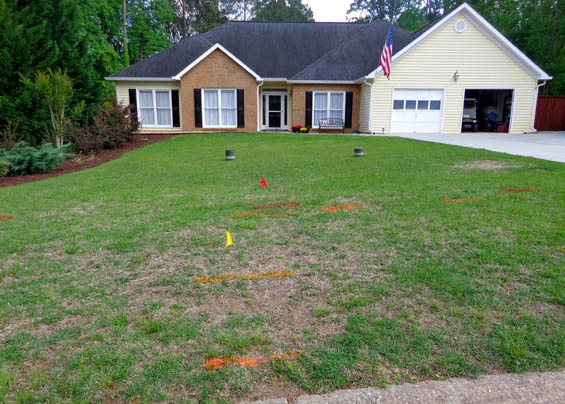
"Before" (5-1-18)
We didn't dig from the red flag to the street, a distance of about 15
feet. That's still all grass and, fortunately, was bright green
and fairly thick the rest of the summer and fall.
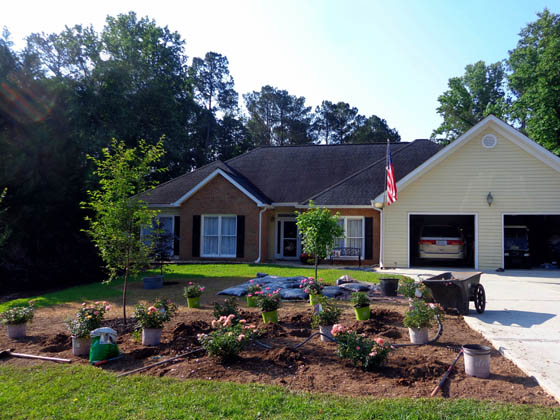
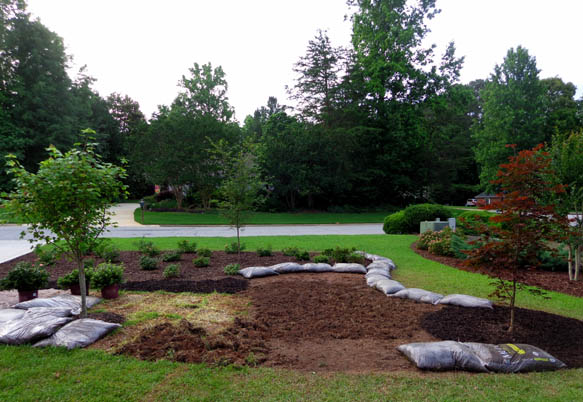
We completed all the planting on May 27. I took this picture a couple
hours before planting the last few azaleas and spreading the remaining
wood chips:
During: almost done!
(5-27-18)
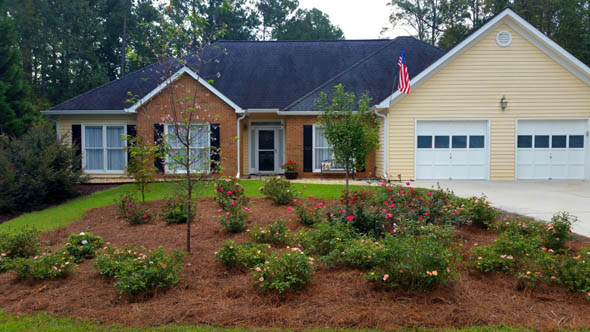
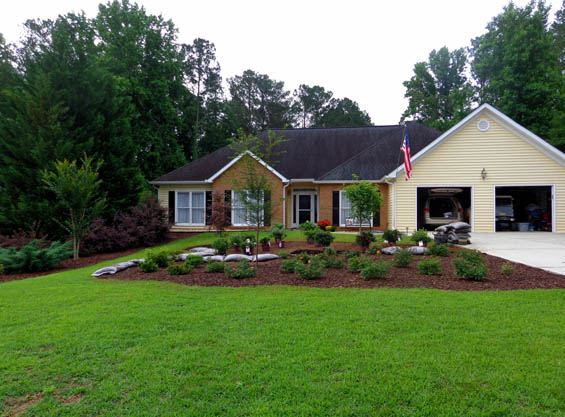
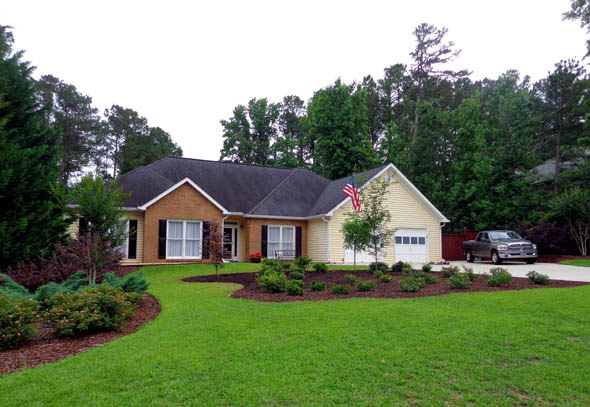
After: The roses and azaleas grew bigger
by mid-October and had continuous flowers all summer and
fall. I decided to put pine straw over the wood mulch to reduce
erosion and make watering easier.
Note the pink flowers on the Okame
cherry tree -- it's supposed to bloom in February!!
Now you know how I spent most of May, 2018. Like many of my projects,
it was harder physically and more time-consuming than I thought it would be.
The rest of this page explains why and how we did it.
STRIVING FOR A PERFECT LAWN
Maintaining a perfect lawn is either expensive if you hire someone
else to do the work or a real pain in the you-know-what if you try to do
it all yourself! We should know, considering the number of different houses
Jim and I have each owned in several different states.
Even though we were disappointed with the relatively barren back yard
when we moved into this house in the spring of 2017, we were mostly
pleased with the aesthetics of the front yard.
The centipede lawn
in front greened up nicely by the end of April that year and the landscaping on either side
was attractive. Shrubs were at or near maturity -- pretty peach-colored
Drift roses, Grey Owl junipers, bright pink Lorapetalum (Chinese fringe flowers),
deep pink Crape myrtles, and a very tall juniper of some sort on the NE
side of the yard (we still aren't sure if that is ours or our
neighbor's tree):
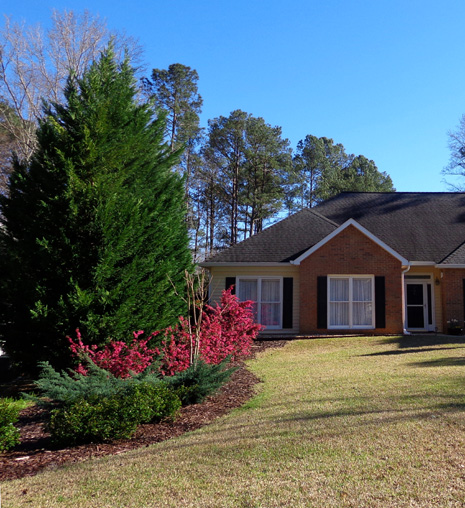
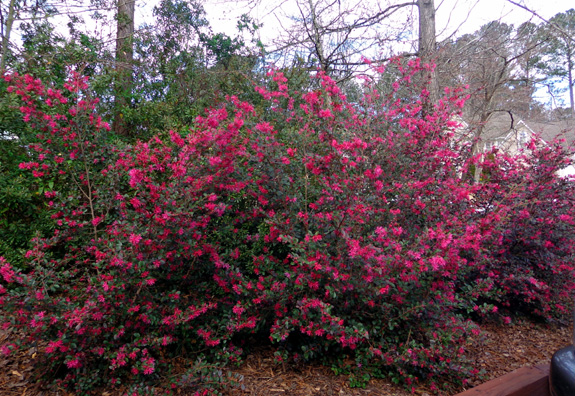
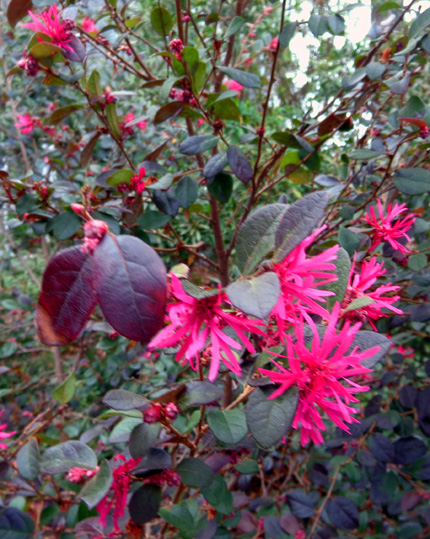
Spring: Dark pink Lorapetalum
flowers are in bloom. (3-3-18)
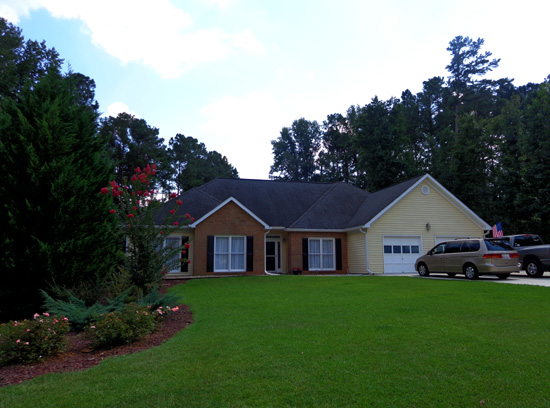
Summer and fall (above and
below): green grass + roses and crape myrtles blooming
(8-22-17)
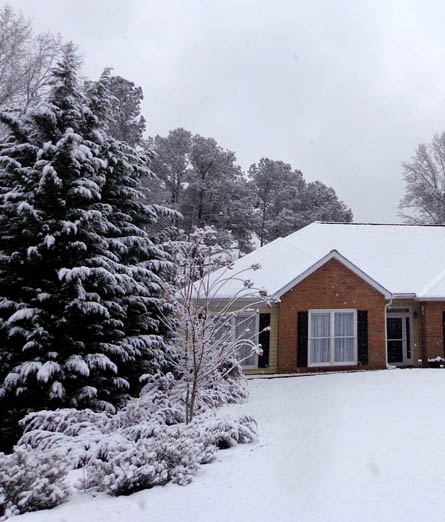
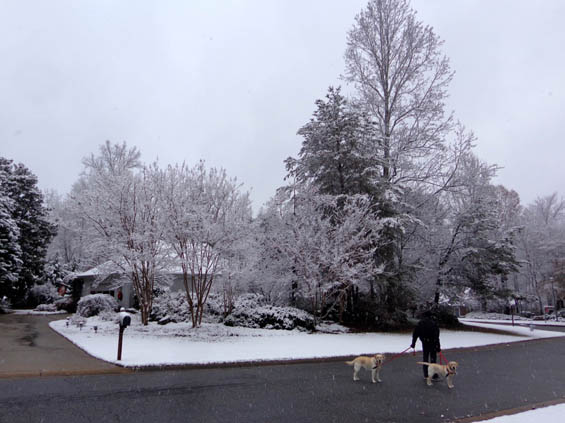
Winter: our first pretty snowfall
at this house (12-9-17)
The two landscaped sides of the front yard look good in every season, especially
since all the shrubs except the crape myrtles keep their leaves year-round.
The Lorapetalum even has some attractive bronze and orange leaves
all the time, mixed in with the dark green leaves. It also has some
flowers all year long but they bloom the most profusely in February and March:
So why would we want to change a thing in the front yard?
Well, during our second spring, weeds in the front lawn were driving Jim nuts,
there were some bare spots you can see in the photo at the beginning of
this entry, and he wanted a permanent solution -- get rid of the grass!
And replace it with what?? I asked in a bit of a panic.
He just said he wanted it to look "natural" and trusted that I could
come up with a solution.
The idea of a "natural" looking
front yard is somewhat radical on this rather manicured street where
almost all the homeowners have taken out all or most of the original
tall native trees in their front yards . . . and put in Bermuda
grass that requires a boatload of maintenance by either the homeowners
or the numerous lawn service companies that serve Peachtree City.
(We've never seen so many lawn and tree service companies anywhere else
we've ever lived.)
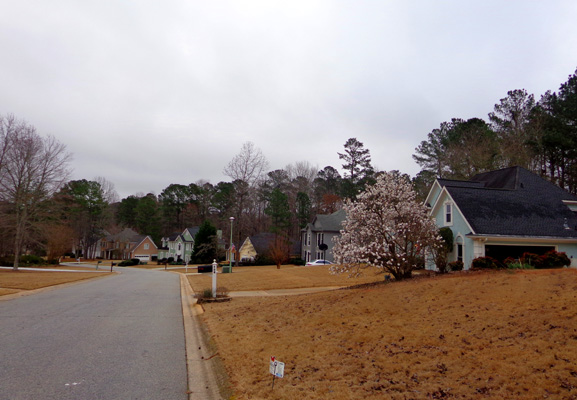
I took this picture 2-20-18 a few
doors up our street before the grass greened up. These yards are
indicative of most in our
neighborhood where homeowners took out trees in front so grass grows better.
The little sign in the foreground indicates a
chemical lawn treatment was done recently.
Although we employed a professional lawn service for several treatments
the first spring and summer we lived here, Jim thought he did enough research
-- talking to those guys, having soil tests done by the Extension Service,
listening to Atlanta's garden guru Walter Reeves on the radio, and searching the
internet -- to learn all about taking care of centipede and zoyzia lawns
himself. He's a frugal fella and hates to spend money on things he can
do as well or better himself.
Neither of us has ever had either of
these two types of grass before (or Bermuda, which is very popular in
our neighborhood) and we quickly learned that each requires a different
kind of fertilizer, pest control, and weed control -- and at
different times of year. Despite using a spreadsheet to keep up with the
maintenance requirements, Jim wasn't pleased with the results.
The zoyzia turf in the back yard
isn't as much of a problem as the centipede in front, even
with the dogs playing (and peeing sometimes) on it. It almost always looks
nice because of Jim's diligent efforts to maintain it, although we do have
to hand-pick weeds out of it occasionally.
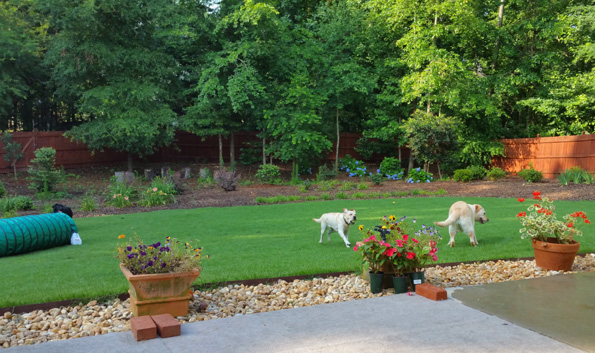
Cody (L, by tunnel) watches as
Holly (center) and Casey chase balls in our back yard. (6-10-18)
Keeping the centipede turf in front (where more people see it!) up to
neighborhood standards turned out to be a steeper learning curve than
Jim expected, however, and by late April he desperately wanted me to
come up with some sort of "natural" solution to replace the grass.
You've already seen my ultimate solution in the photos above.
I tried easier ones first. Jim didn't like my suggestion
of just keeping the centipede and re-employing a professional lawn maintenance service to take care of
it. Nor did he like the idea of having professionals replace the
centipede with zoyzia, since we like it better. Both solutions were too expensive, he said.
I quickly replied that any "natural" solution that would meet
community standards to cover half or more of the front yard would have
an initial cost that would be higher than several years of professional
maintenance! He asked me to go ahead and see what I could come up with.
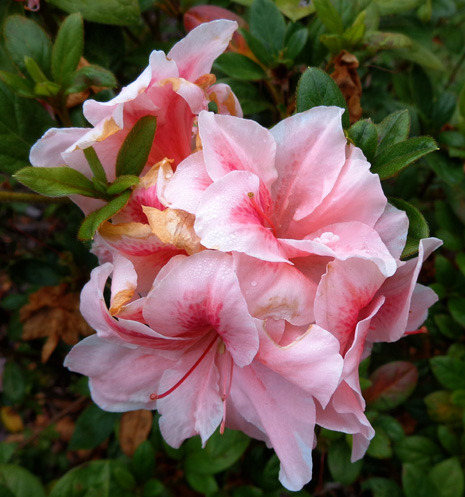
It was fun to pick out gorgeous
plants for the front yard, like
this Encore azalea. (8-30-18)
My "solution" was expensive -- I haven't added it up -- but I did
save money by getting most of the shrubs and trees when Pike Nursery had
them for 20% off and/or using their Mother's Day gift card special (buy a
$100 gift card and get a "free" $25 gift card -- we
spent $1,200 doing that = $1,500 to spend). For items at regular price I could get a
10% military discount.
We also saved a bundle by doing every bit of the grunt work ourselves.
There was a lot of grunting involved during construction, as well
as sweating and even some swearing.
PHASE 1: THE PLAN
Ambitious amateur landscape designer that I am, I thought maybe we could
sort of emulate the beautiful natural-looking landscape of our neighbors directly
across the street from us -- not try to copy it, but use
it for inspiration.
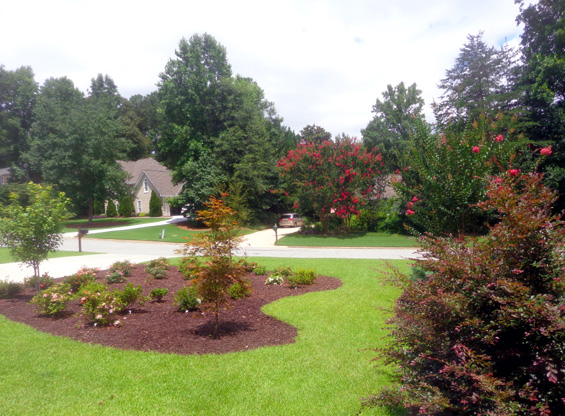
Out of about twenty-two properties on our two connected cul de sacs,
their yard (next two photos) is one of the few with so many trees and shrubs between the
house and street.
We love how it looks year-round, with beautiful
flowering shrubs and trees in the spring and summer, pretty colors in the fall,
and some evergreens in the winter:
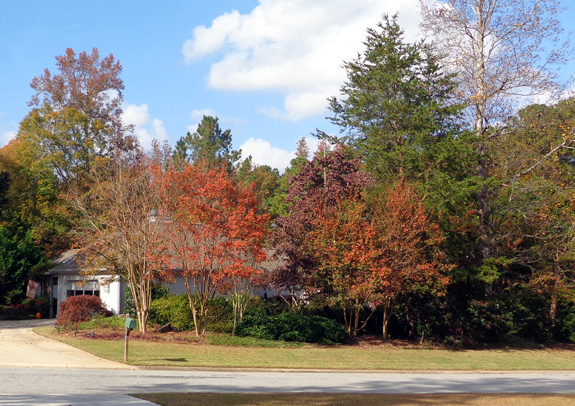
The neighbors' yard looks
"natural" and is attractive all year long (autumn, above, and
winter, below).
[Jim is walking Casey and Holly
but the dogs are waiting for me to take the picture.]
The neighbors' yard has handsome, mature trees, azaleas, crape myrtles,
other shrubs, perennials, and groundcovers, some of which have
probably been there since the house was built 28 years ago.
It's to our advantage that they have kept all those
trees and shrubs -- and are right across the street from us, so
our new landscape won't look like a total anomaly as it matures.
I knew I couldn't plant (let alone find) mature azaleas,
camellias, crape myrtles, and tall trees for our yard but I figured I
could come up with a similar "natural" design that would mature
gracefully and fill in most of our front yard in ten or twenty years. It
could also eventually provide some privacy and shade.
I had some ideas floating around in my head about incorporating a
large, artistically-shaped, mulched bed AKA "island" in the front yard
but decided to look around nearby neighborhoods more closely on my walks and bike/cart
rides to get other landscaping ideas before committing to any particular
design. I also looked online at several landscaping/gardening sites for
inspiration.
The shape of things to come: view of the
landscape island from the window by my desk. Later I dug out a
little more
grass to soften the indented curve on the right
so it was easier for Jim to mow around it. (7-9-18)
After gathering ideas from other sources I drew several potential
designs on graph paper, with three trees anchoring the space and several
clumps of shrubs around them.
I had some types of trees and shrubs in mind that I really like
and/or have grown at other houses in Virginia and Georgia but I needed to do more research
online to be certain of what grows well here, how big they get at
maturity, and what features they may have that are particularly
desirable or undesirable. I wanted the right plants for the right place.
Since our house is just one story, I wanted trees that might get a
little taller than the upper roof line but not so tall they tower over
the house or so wide they'd dwarf it or create too much shade for shrubs
and groundcovers planted under them.
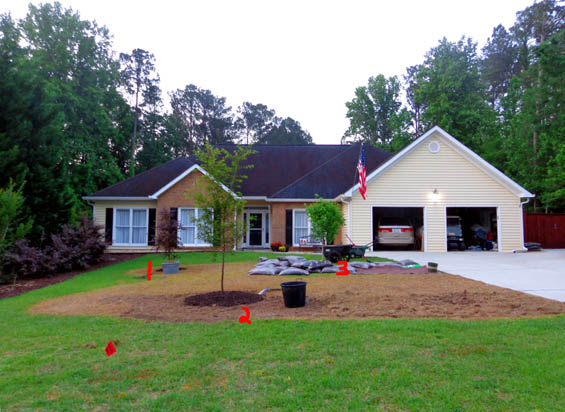
We planted the three trees first. Number 1 is a
Japanese maple, #2 an Okame cherry,
and #3 a Brandywine red maple. Each has one or more
outstanding features. (5-12-18)
I had some of the same criteria for these trees and shrubs as I did
for the ones in the back yard.
- I knew the deciduous trees I
liked best
would drop their leaves in the winter but I wanted them to have
pretty leaf colors in the fall and/or flowers in the spring --
something like a dogwood, redbud, or fruit tree, for example.
- I wanted the shrubs to retain all or most of their leaves in the
winter, have flowers from spring to fall, and grow at a moderate or
fast rate so the clumps would fill in.
- And everything had to coordinate not just with other plants in the
"island" where we removed the grass, but also look good with the
already-established Drift roses, junipers, crape myrtles, and Lorapetalum nearby.
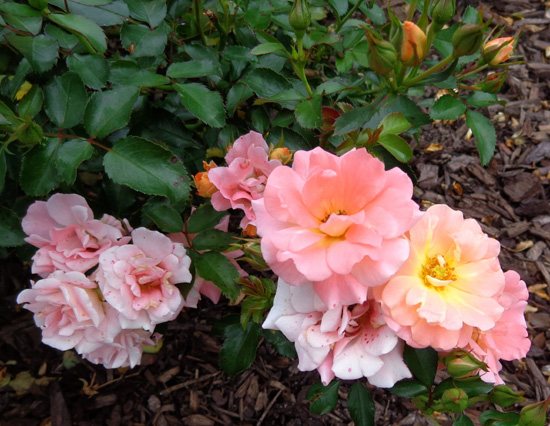
Each new Peach Drift rose bush has a variety of colors and forms of
flowers,
as shown above, which is both interesting and
unusual. (8-30-18)
All of this was a tall order but
I approached it methodically and got more and more enthusiastic about it as
I made decisions about what to plant and where.
Although the process got stressful during the actual construction of
the island, especially getting rid of the grass, the planning and
purchasing phases were great fun. I love to find the "perfect" plant for a
particular location and dream about the Big Picture of how it's all
going to look someday.
I'm dividing this project into phases but the remaining ones had some
overlap. For example, we started planting some of the shrubs and trees
in the front section toward the street before removing all of the grass in
the section closer to the house.
PHASE 2: CHOOSING THE PLANTS
Gotta admit, this part was the most fun of the whole project!
In order to take advantage of either newly-arrived plants at Pike's
or their sporadic 20% off sales on what I wanted, I purchased
most of the shrubs and two of the trees before we even had the
grass removed for the island, let alone dozens of holes dug.
And Jim talked me into getting 30 bags of wood mulch at Lowe's even before
that when they were only $2/bag! [Note to self:
No matter how much of any kind of mulch you choose, it won't go as far as you think
it will and you'll have to go get more.]
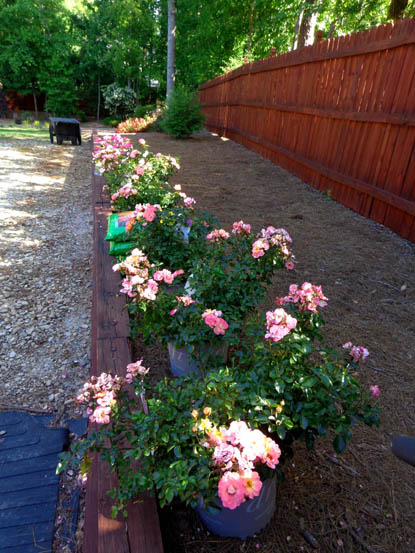
Drift roses in waiting, stored
behind the fence until ready to plant (5-7-18)
I chose two 30-gallon trees -- a
Brandywine red maple and an Okame
flowering cherry. The red maple can eventually reach 40 feet high and 20
feet wide, the cherry 20-25 feet high and wide. We spaced them far
enough apart with their mature size in mind.
The red maple has
green leaves in the spring and summer, and long-lasting, brilliant red
to reddish-purple color in autumn. The leaves weren't very bright this
fall because so many had fungus on them in the summer from too much
rain. Some of them fell before they had a chance to turn red. Hopefully
they'll do better next year.
Okame cherry trees have
beautiful pink blossoms in mid-February, green leaves in spring and
summer, and gold leaves in autumn. There are a lot of cherry trees in
Peachtree City and they are simply stunning in early spring, just as
they are in Washington, DC.
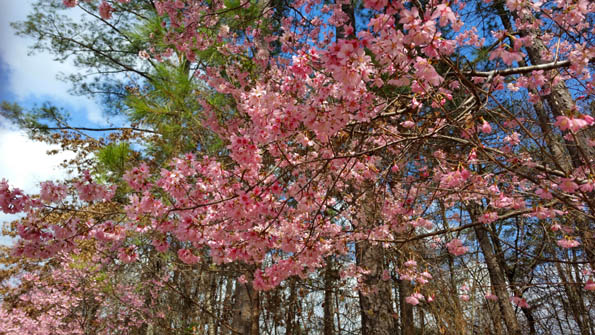
There is a line of what I think
are Okame cherry trees on both sides of a street
that's on one of our favorite walking routes. It
was stunning in February. (2-17-18)
The 9-foot-tall Okame cherry tree we purchased looked great until August,
when fungus from too much rain made all the leaves turn yellow and drop
off. The Pikes manager, a young fella with a masters degree in
horticulture, assured me it's normal for cherry trees and some other
fruit trees to drop their leaves that early in Georgia, even in
non-monsoon years. OK then.
What really surprised both the manager and me was soon after all the
leaves came off, new green leaves and pretty pink FLOWERS appeared on
the tree -- in late September, for crying out loud! I don't think
he would have believed me if he hadn't seen pictures of it on my phone.
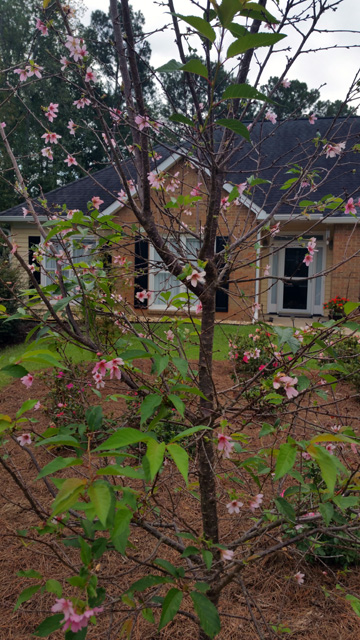
Confused Okame cherry tree,
blooming in mid-October
instead of mid-February (AND with
new green leaves)
More and more new leaves and flowers appeared in October and many are
still there at Thanksgiving! I'm just hoping the tree flowers again in
February, when it's supposed to. It's a very confused young tree right now.
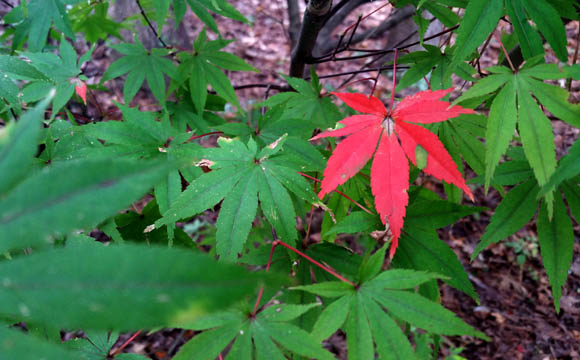
The third tree in my plan was the Bloodgood Japanese maple I'd planted
in the back yard a few weeks prior to this. I decided it made a better
specimen in the front of the house than 'way back near the fence behind
the house where even we couldn't see it very well and no one else could, either.
This tree had dark red leaves in the spring when I transplanted it
from a more shady spot in the back yard. Then it gradually turned mostly
green in the summer, perhaps because it had more sun. In the fall it
turned darker red again, and a more bright red in November.
The autumn transformation began with just one precocious little red
leaf in mid-October:
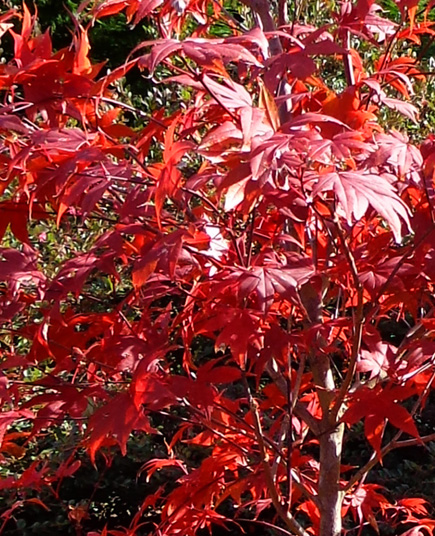
The next two photos show its color on November 25:
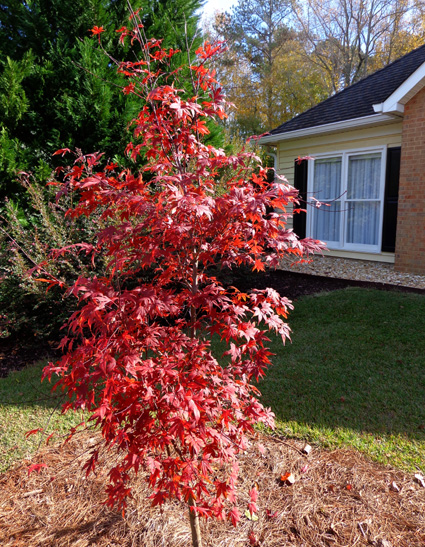
Above and below: Bloodgood
Japanese maple (11-25-18)
The mature size of the Japanese maple is approximately 15-20 feet tall and wide.
It's a very popular tree in Peachtree City because the color is so
stunning this time of year.
I also chose about twenty peach-colored
Drift roses to match the
ones on either side of the yard, six Knockout roses in two shades of pink,
and a couple dozen Encore azaleas in a variety of white-pink-salmon colors.
Drifts are called "groundcover" roses because they are relatively low
and spread two-four feet wide. They grow very quickly and are covered
with lots of flowers from spring to December. They keep most of their
green leaves all winter, too. I love them! That's why I have so many in
the front and back yards.
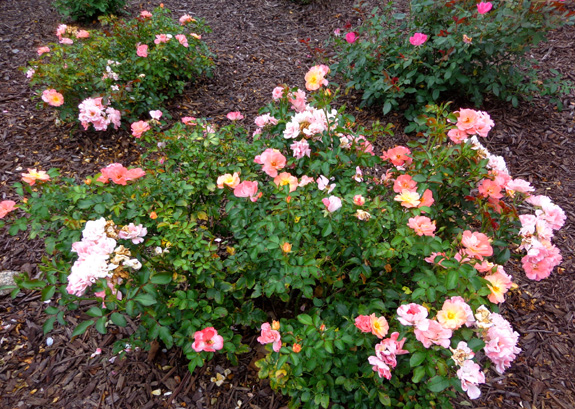
Some of the Drift roses I planted
in front quickly spread to 3 or 4 feet wide. They've been
full of flowers since I planted
them in late May; it's now late November. (8-30-18)
Knockout roses get taller
than Drifts and not as wide the first
couple of years but they can get quite large when mature. Our Knockouts
have fewer flowers so far than the Drifts. Both types stay green all
winter.
Both types also produce more flowers faster when dead-headed after
blooming and they should be pruned in late winter/early spring to be
bushier. The only other things they require are occasional fertilizing
and watering when needed.

Pink Knockout rose
(7-30-18)
Encore azaleas are also fabulous.
As the name implies, the flowers keep coming back from spring to fall/early
winter. Our roses and azaleas were still blooming in mid-December last
year and they're going strong right now in late November of this year.
There are currently thirty-two varieties of the Autumn series of Encore
azaleas and we've got more than twenty of them. They have
different shades and sizes of green leaves in the spring and summer.
Some types have leaves that turn bronze or other colors in the fall.
The flower sizes, shapes, and colors also vary from one type to another.
The leaves on Encore Autumn
Carnation will turn bronze in the winter. (7-2-18)
Encore Autumn Twist has unique
purple stripes. (7-2-18)
The local
Pike's has had a good selection of almost
all the different varieties of Encore azaleas year-round, since they can
be planted in this growing zone about any time. I spent a while looking
at the Encore website to determine which types to use in each of four
different groups in which I planted them so the heights, colors, and
times they flower would work well together in each clump.
I'll do a separate entry on Encores someday so I can show
the flowers on all the different ones we have.
PHASE 3: "CONSTRUCTION" (DE-STRUCTION??)
PHASE
OK, just how did we proceed to prepare
the "island" and plant all these things??
First, we had the utility locators come out and mark the locations of
the electrical, gas, water, and AT&T lines. They all came within a day
or two. This is a critical step before digging.
Unfortunately, no one could/would tell us where our sewer line is.
Fortunately, we never hit it!
Here's another view of the marked lines
relevant to this project. I took photos
everywhere they marked for future reference,
although it's safest to have
them mark the utilities again if we dig somewhere
else. (Day 1, 5-1-18)
The next step was determining where to make the large planting bed and
how to make it attractive. I call it an "island" because "pine island"
is a common term in this area for large mulched areas with one or more
trees, usually pines, in them. You can see them all over the metro
Atlanta area in peoples' front yards. There may or may not be
an under-story of shrubs or flowers.
From looking online and at other yards in Peachtree City, I knew I
wanted sort of a free-flowing, curving design and not just a square or
rectangle. The easiest way to do this is to lay out flexible
garden hoses until you find a design that is pleasing.
We tinkered with our hose design for a while and expanded it a few feet
after starting to kill or otherwise remove the grass.
I should have taken a picture with the hoses but didn't. You can see the
original outline in the next picture where the grass is starting to die
or is covered up:

The grass in the island was starting to lose its
color one week after applying Roundup but not dead
enough to dig it up easily. We went ahead and planted the
cherry and Japanese maple trees Day 8.
I placed old, empty shrub/tree containers where I wanted the three trees, then
visualized how I wanted the groups of roses and azaleas to be arranged.
I soon realized the island needed to be bigger than originally planned.
I had to consider how large everything will eventually get. We can
always expand the island in the future if we decide to add more shrubs.
The next step was getting rid of the centipede grass. There's a good
reason why it's got that name! By early May, it was green and firmly
rooted. I wanted all the roots out and tried to saved as much of the
topsoil as I could. Composted dirt went down only about 3-4". Below that
was common, ubiquitous Georgia clay. Ugh.
Above and below: By Day 13 we
were able to dig up the
front part of the island and plant most of the
roses.
We researched different ways to completely remove grass. Some were
simply too unsightly for our neighborhood. Others would take too long or cost too much.
The first method we chose was spraying Roundup on about three-fourths of the
grass we wanted to take out. That's what is fading or brown in the pictures above.
Using Roundup wasn't totally satisfactory because it
took almost two weeks for that grass to die, we were concerned about the effects
of soil contamination on the new plants we were putting in, and we still had to
carefully remove all the dead grass and roots from the dirt with hand tools.

Day 14: We had several roses planted and mulched,
but more grass in the
light brown area needed to come out before we could
plant more shrubs.
Day 24: We got a lot of rain the
past 10 days, which slowed progress.
You can see how we worked in
sections, extracting grass as weather allowed.
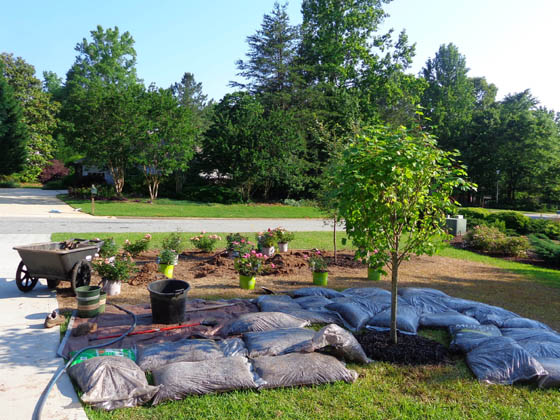
While we were waiting for the Roundup-sprayed part to die, we planted the three trees
and tried to kill the remaining grass in the island by covering it with
a tarp and several bags of the wood mulch we had purchased. That didn't
work well because it rained a lot the last half of May and the grass
just decayed and got slimy, not brown.
The dead grass we had sprayed with Roundup wasn't real hard to extract
from the soil when the ground was dry in early May;
it just took a lot of time with digging/beating/shaking it with hand
tools to get all the roots out and
preserve as much topsoil as possible.
Once we had the first good-sized
section cleared on the part of the island near the street, Jim started digging holes for the roses. We'd get
several planted and mulched, then I'd get busy extracting grass from the
dirt again. When it began raining the third week of May, it was harder
to extract even the dead brown grass and roots from the wet soil and our
progress slowed.
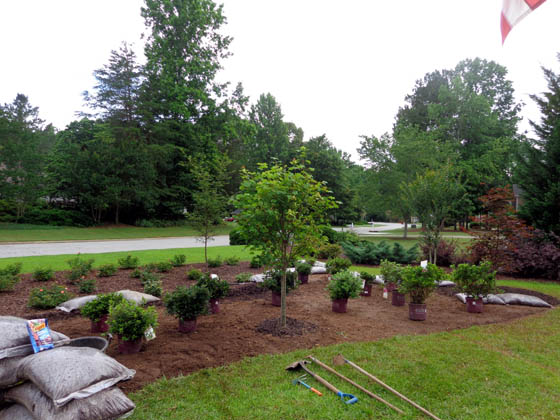
Above and below: Day 27,
planting the last remaining azaleas (about 15 of them)
The worst part of the whole project for me was digging up the remaining wet,
slimy, still-green, decaying grass under the tarp and bags where we
didn't use Roundup. It was hard work. I turned the wet clumps over so the dirt
and clay would dry out but continuous rain hampered my progress.
Some days it was simply too wet to remove grass or dig holes for more shrubs.
I was frustrated because I wanted to get the project DONE. It seemed
like an eternity before we got all the grass removed but it was actually only about twenty days.
PHASE 4: PLANTING THE TREES AND SHRUBS
Jim was particularly helpful here because he dug most of the holes for
me. As noted, there were about four dozen good-sized holes that had to
be excavated. Then I did most of the planting myself, tweaking my
not-so-final design plan a bit as I planted each group of shrubs.
I used the best techniques I know to properly plant all the trees and
shrubs -- holes as wide and deep as recommended, amended soil in
the bottom, plants put in at the correct depth, lots more amended soil
placed around them and tamped down, proper watering, and adequate mulch
when done. Each plant had fertilizer in its pot so I didn't add much
more starter fertilizer.

Even though all these trees and shrubs are guaranteed for life, it is
so much work to plant them that I want each and every one of them to
flourish. It's a pain when I have to take any of them back.
RESULTS AFTER SIX MONTHS
At the time I'm writing this in November, all the trees and roses and all but
two or three of the Encore azaleas in the island have done quite well.
One azalea died in October for unknown reasons and I got a refund for
it. Since we're going to be gone in December and January, I haven't
replaced it yet. Two others have some dead branches all of a sudden.
Again, I don't know why. I'll see what they look like in the spring
before deciding whether to replace them, too.
We started killing some of the grass on May 1 and digging up the first
clumps about May 12. We finished planting and distributing the mulch on May 27,
a total of twenty-seven days. It would have gone faster without all the rain.
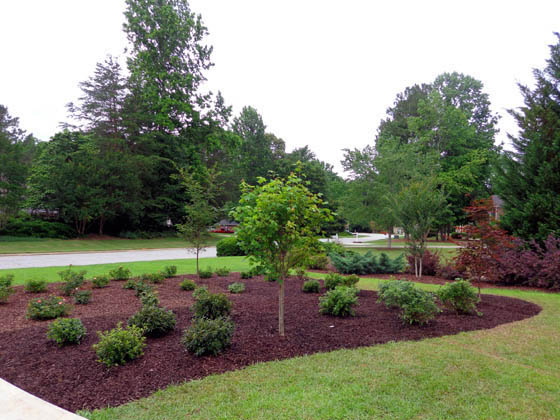
Day 27: View from the
street the day we completed the initial project
I have done only a little tinkering with the island since May 27.
I took out a little more grass in the indentation
on the left that you can see in the picture above so it'd be easier for Jim
to mow. I added a little yellow/orange rose bush a neighbor gave me near
the driveway where she can see it from her house, and
one new Encore azalea in a spot near the Japanese maple. I put pine
straw over the wood mulch to reduce erosion from heavy rains and to make
watering easier.
I've also added
some groundcover plants next to the driveway. Initially I thought about planting some sort of sun-loving edging around the
island next to the grass. Online research led me to
Asiatic jasmine as a possibility, so
when the project was mostly done I hunted for it at Pike's.
They had two types, both of which are evergreen, low, and spread up
to 24" in diameter. The plants I bought are already about 18" in
diameter after six months.
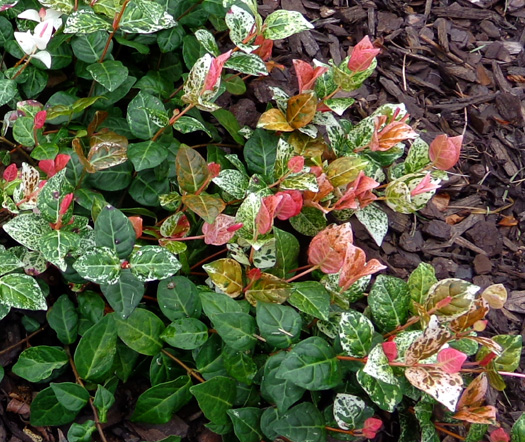
The more common and less expensive variety I found has red, orange,
and green leaves. The kind I chose, however, is called
Snow 'n Summer. It has softer colors
of pink and white with green, which look better next to the variations
of pink/salmon azaleas and roses next to it:
I eventually ended up with six plants and put them next to the
driveway instead of the grass. They'll get more sun there and won't get
mixed up with grass. The more sun Snow 'n Summer gets, the
more pretty pink and white colors it has.
I'll continue to look next spring for something suitable to plant
next to the grass in hopes of ending the manual edging I have
to do occasionally when the centipede invades the mulched island. Hard
edging like bricks or concrete aren't suitable because I may expand the
island someday and the centipede will grow over and around it anyway.
That doggone centipede grass is still a bit of a problem, isn't it?
Next entry: after all these years -- Jim's
return to competing in ultra-distance foot races [well, before I could get to
that we had to say goodbye to Cody, so the next entry is about his
well-lived life]
Happy trails,
Sue
"Runtrails & Company" - Sue Norwood, Jim O'Neil,
Cody, Casey, and Holly-pup
Previous
Next
© 2018 Sue Norwood and Jim O'Neil